


Using Track Changes
Changes that were previously made to your content on a Word document can easily be viewed directly in your Papercurve Workspace. This provides a more efficient review process while also ensuring that no communication is lost.
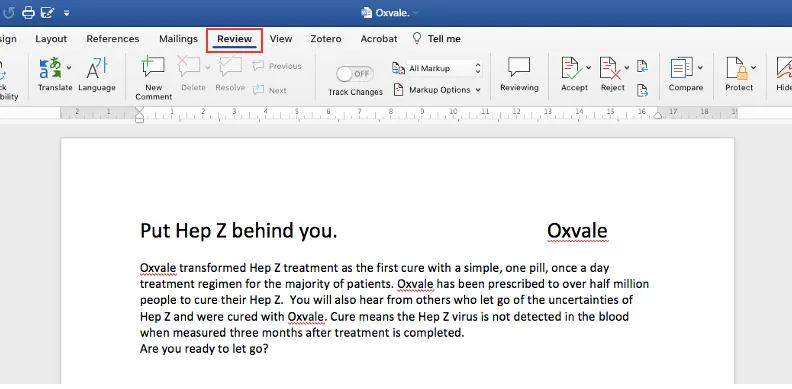
1. To begin, open your document on Microsoft Word and click Review from the menu options located on the top toolbar.
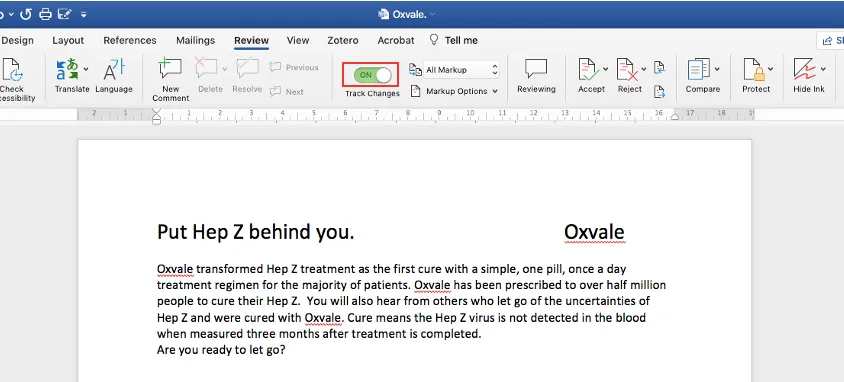
2. Next, navigate to Track Changes and turn on the switch. Once the toggle has been successfully turned on, it will turn green.
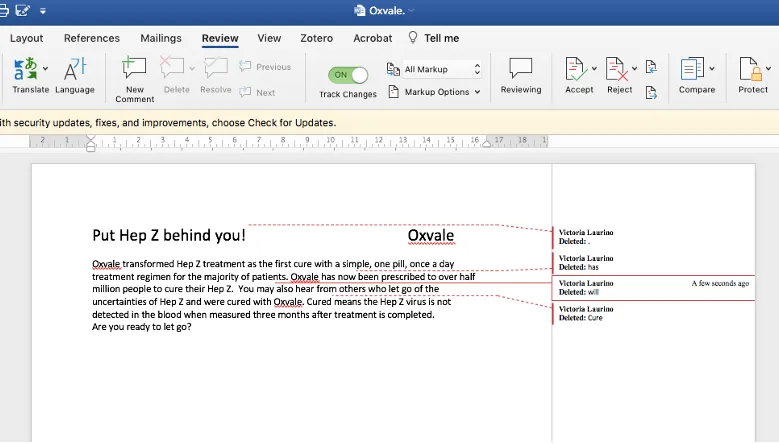
3. Now, you can begin editing the document. Any changes that you make to the document from this point on will be visible on the side panel, along with your name.
3. Once you have finished editing your content, proceed to saving the document and then uploading it as you normally would on your Papercurve Workspace. Once uploaded, you will now be able to see all the edits that had been made previously directly within your workspace!
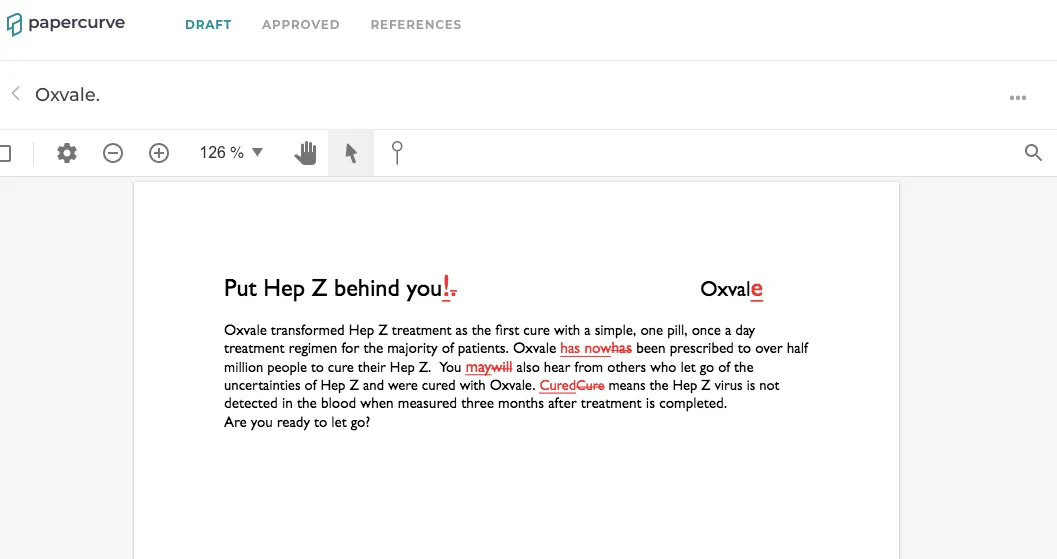
Note: Only changes made to the document will appear on Papercurve, not the comments.
Still have questions?
Chat
9am – 5pm Eastern Time, by clicking the icon in the bottom right corner of the screen.